Satin Stitch: How to Fill Shapes Smoothly
Satin stitch fills small shapes with smooth, parallel stitches. Outline the shape first, start across the widest part, and keep the stitches short and parallel for a clean edge.
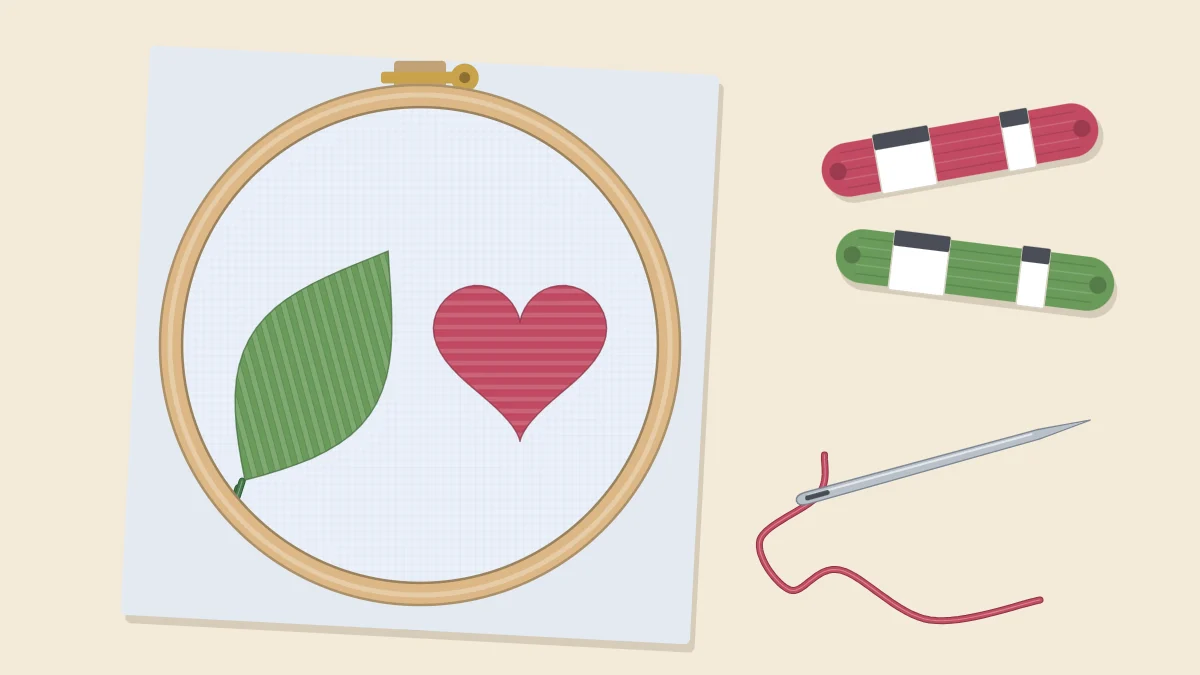
Tutorial at a glance
Materials
- Medium-weight woven cotton or linen-blend fabric
- 6-inch (15 cm) embroidery hoop
- Sharp embroidery needle
- Six-strand cotton floss in one color
- Pencil or water-soluble pen
- Small scissors
Satin stitch fills a shape with straight stitches laid side by side, so close together that no fabric shows between them. Done well, the floss catches the light like a ribbon. The stitch itself could not be simpler, since it is only up on one edge and down on the other, but a smooth result depends on preparation: a firm outline, a sensible starting point, and stitches that stay parallel.
It is worth saying plainly that satin stitch takes most beginners several tries. Start with small shapes, expect the first ones to look a little uneven, and the improvement comes quickly.
What You Need
Use a medium-weight woven cotton or linen blend and hoop it drum-tight, because slack fabric is the main cause of puckering under a dense fill. Draw two or three small leaves and a circle, each no more than about 1/2 inch (about 1.3 cm) across at the widest point. A sharp embroidery needle and one color of floss are all you need besides.
Choosing a Strand Count
Fewer strands give a smoother surface. With many strands in the needle, the individual strands twist around each other and the fill looks ropey.
| Strands | Result | Good For |
|---|---|---|
| 1 | Very smooth and fine, but slow to fill. | Tiny shapes and careful work. |
| 2 | Smooth, with reasonable coverage. | Most small shapes; a good starting point. |
| 3 | Faster, with slightly more texture. | Larger simple shapes. |
Whatever number you use, pull the strands out one at a time and put them back together before threading, as described in how to separate embroidery floss. Strands that lie flat next to each other cover far better than strands still twisted together.
Outline the Shape First
Before filling, stitch around the edge of the shape with small, neat stitches in the same color. Split stitch is the traditional choice, and backstitch works just as well if that is the stitch you know. The satin stitches then go over this outline, coming up and going down just outside it.
The outline does two jobs. It gives the needle a firm ridge to tuck against, so every stitch ends in a clean line, and it lifts the edge slightly so the shape looks gently padded.
How to Work Satin Stitch Step by Step
These steps fill a leaf shape. The numbers match the diagram.
- Start in the middle. Find the widest part of the leaf. Bring the needle up at point 1, on one edge, just outside the outline.
- Cross the shape. Take the needle straight across and go down at point 2 on the opposite edge, again just outside the outline. Pull the floss through gently until the stitch lies flat without dragging the fabric in.
- Come up beside point 1. Bring the needle up on the same edge you started from, right next to the first stitch, one thread’s width toward the tip. The floss travels across the back of the shape to get there.
- Lay the second stitch. Go down on the opposite edge, right next to point 2. The new stitch should lie snug against the first and parallel to it, with no fabric showing and no overlap.
- Work toward the tip. Keep adding parallel stitches. They get shorter as the leaf narrows, and the last one at the tip may be very small.
- Return to the middle. Slide the needle under the stitches on the back to get to the center again, or end the floss and restart. Fill the other half from the first stitch out to the base in the same way.
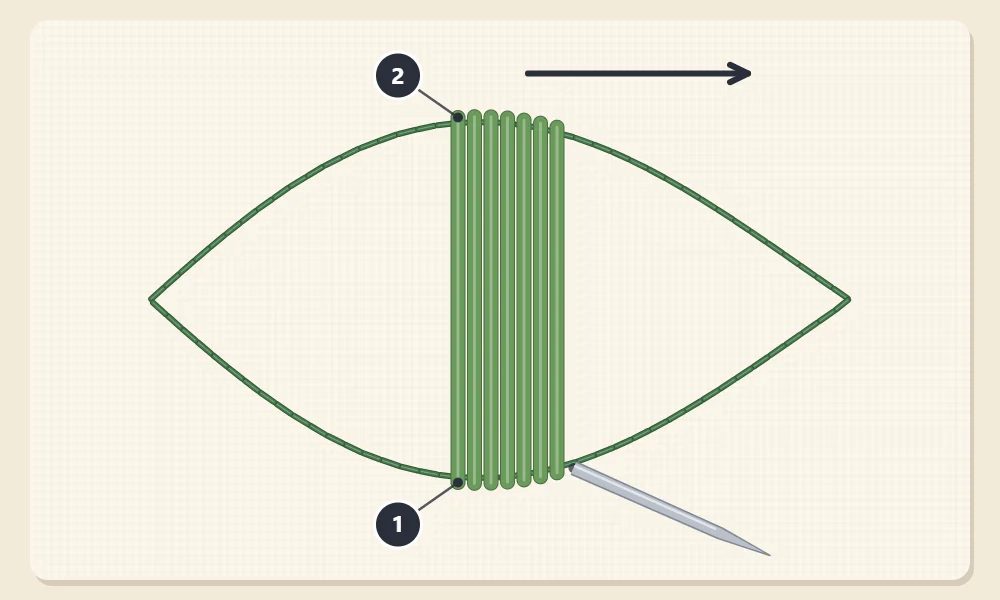
Starting in the middle matters because that first stitch sets the angle for all the others. If you begin at a narrow tip, a small error in direction grows with every stitch, and by the widest part the stitches are visibly fanning out.
Keeping Stitches Parallel and Smooth
- Always come up on the same side. Coming up on one edge and going down on the other means the back is covered as fully as the front. It uses more floss, but the stitches lie smoother and hold their position better than when you zigzag back and forth along one edge.
- Check the angle every few stitches. Compare the newest stitch with the first one. If it has started to tilt, correct it gradually over the next two or three stitches.
- Use the needle to stroke the floss flat. As you pull each stitch through, run the needle shaft under the floss so the strands spread side by side instead of twisting.
- Let the needle hang now and then. Floss twists as you stitch, and twisted floss does not cover well.
- Place stitches close, not on top of each other. Crowded stitches pile up into ridges, and gaps show fabric.
Tip
If you find it hard to keep the angle, draw a few light parallel guide lines inside the shape before you start. They disappear under the stitches and give your eye something to follow.
How Big Can a Satin Stitch Shape Be?
Long stitches are loose stitches. Once a single stitch is much longer than about 1/2 inch (about 1.3 cm), it tends to sag, shift and snag, especially on anything that will be handled or washed. For wider shapes, divide the area into sections and fill each one separately. A leaf, for example, can be split down its center vein and stitched as two halves. On useful items such as the embroidered tea towel, keep satin stitches short for the same reason.
Common Problems and Fixes
- Ragged edges. Add an outline first, and bring the needle up just outside it every time.
- Fabric showing between stitches. Place the stitches closer together. A stray gap can often be filled with one extra stitch slipped in beside its neighbors.
- Puckered fabric around the shape. The stitches are pulled too tight or the hoop is loose. The guide on how to fix puckered embroidery covers both the repair and the prevention.
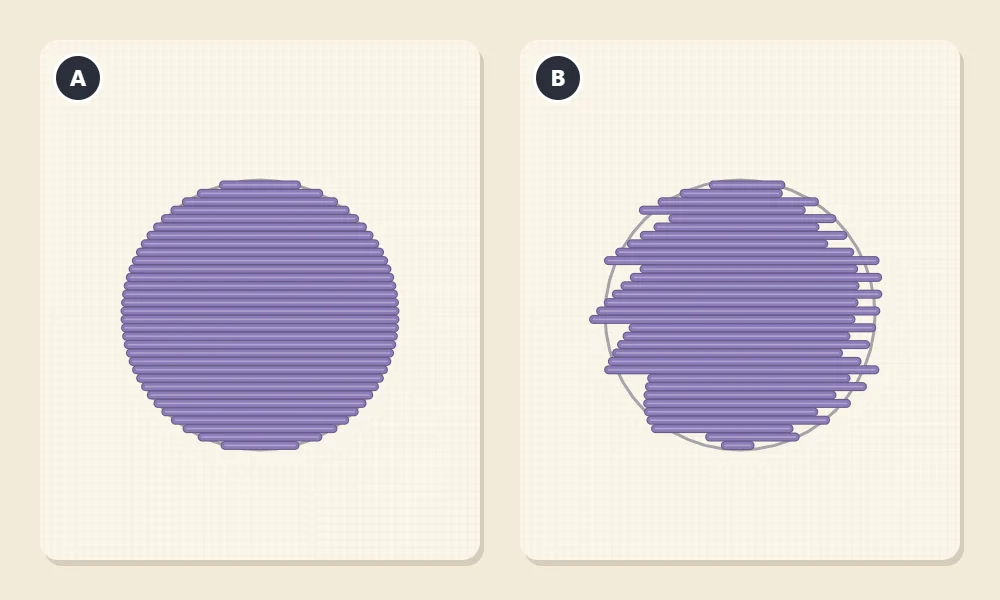
- Stitches fanning out of line. Start again from the middle of the shape and use guide lines.
- A dull, ropey surface. Use fewer strands and separate them properly before threading.
Once small leaves and circles look even, try filling the strokes of a letter, as in the embroidered initial hoop, where a backstitch outline is already in place to stitch over.
Frequently asked questions
Do I have to outline a shape before satin stitching it?
It is not required, but it is the easiest way to get a crisp edge. A split stitch or backstitch outline gives the needle a ridge to tuck against and raises the edge slightly.
How many strands of floss are best for satin stitch?
Two strands is a good starting point for small shapes. One strand gives the smoothest finish but takes longer, and three covers faster with a little more texture.
Why is my satin stitch bumpy or uneven?
Usual causes are twisted floss, stitches overlapping instead of lying side by side, or strands that were not separated before threading. Let the needle hang to untwist the floss and stroke each stitch flat.
What is the longest a satin stitch should be?
As a guide, keep each stitch to about 1/2 inch (about 1.3 cm) or less. Longer stitches tend to sag and snag, so divide bigger shapes into sections.