Embroidered Initial Hoop: An Easy Monogram Project
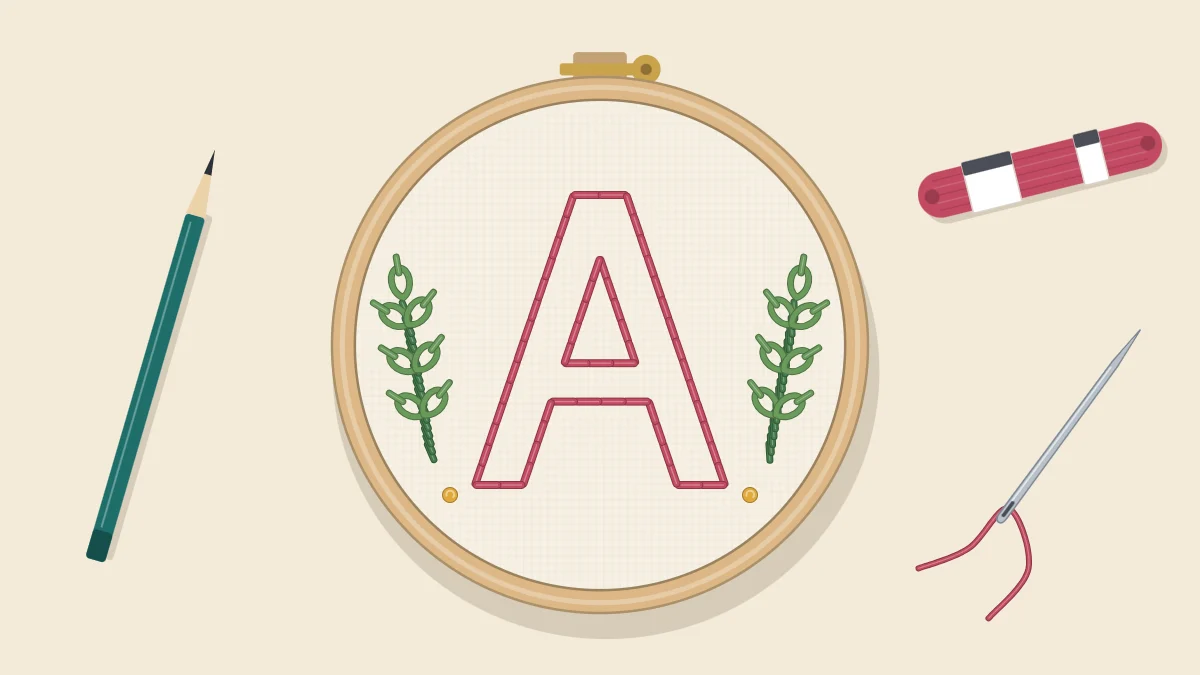
Stitch a single initial in a 6-inch hoop: choose and size the letter, center it with two guide lines, outline it in backstitch, then add an optional satin stitch fill and two leafy sprigs.
Tutorial at a glance
Materials
- 6-inch (15 cm) embroidery hoop
- 9-inch (23 cm) square of light medium-weight cotton or linen
- Six-strand cotton floss in a letter color and a green
- Embroidery needle
- Small sharp scissors
- Printed or hand-drawn letter
- Pencil or water-soluble fabric pen
- Ruler
A single letter is one of the kindest designs a beginner can pick: it has only a few lines, it needs one main stitch, and the result looks deliberate even when the stitches are not perfect. This project outlines one initial in backstitch inside a 6-inch (15 cm) hoop, with an optional satin stitch fill and a small leafy sprig on each side. The example letter is A, but the method is the same for any initial.
What You Need
- A 6-inch (15 cm) embroidery hoop
- A 9-inch (23 cm) square of light, medium-weight cotton or linen
- Six-strand cotton floss: one color for the letter and one green for the sprigs
- An embroidery needle and small sharp scissors
- A printed or hand-drawn letter, a pencil or water-soluble pen, and a ruler
Choosing and Sizing the Letter
The style of the letter decides how hard the project is, so choose it with the stitching in mind.
- For an outline only: almost any clear letter works. A simple serif or a rounded block letter gives the backstitch something interesting to follow.
- For a satin stitch fill: pick a bold letter whose strokes are about 1/4 to 3/8 inch (6 to 10 mm) wide. Narrower strokes are fiddly to fill, and wider ones need long stitches that snag and sag.
For a 6-inch hoop, a letter about 3 inches (7.5 cm) tall is a good starting point. That leaves room for a sprig on each side and a clear border of fabric inside the ring. The easiest way to get the size right is to type the letter in a word processor, enlarge it, print it and measure the printout, adjusting the font size until the height is right.
Tracing and Centering
A letter that sits slightly off-center or tilted is far more noticeable than an uneven stitch, so spend a few minutes on placement.
- Press the fabric. Fold it in half and crease the fold lightly with your fingers, then open it and fold it in half the other way. The two creases cross at the center.
- With a ruler, draw a light dashed line along each crease, extending a couple of inches (about 5 cm) from the center in each direction: one vertical line and one horizontal line.
- On the paper printout, mark the vertical middle of the letter and the midpoint of its height. Remember that the visual middle of a letter such as A is its point, not the middle of its crossbar.
- Tape the printout to a bright window or a light source, lay the fabric over it and line up the two dashed lines with the marks on the paper. Tape the fabric so it cannot shift.
- Trace the letter with a sharp pencil or a water-soluble pen, using light, single strokes.
- Lightly sketch a sprig on each side: a gently curved line about 1 1/2 inches (4 cm) long, leaning away from the letter, with three or four small leaf marks along it.
- Mount the fabric in the hoop with the vertical guide line pointing straight at the screw, and tighten until the fabric is taut.
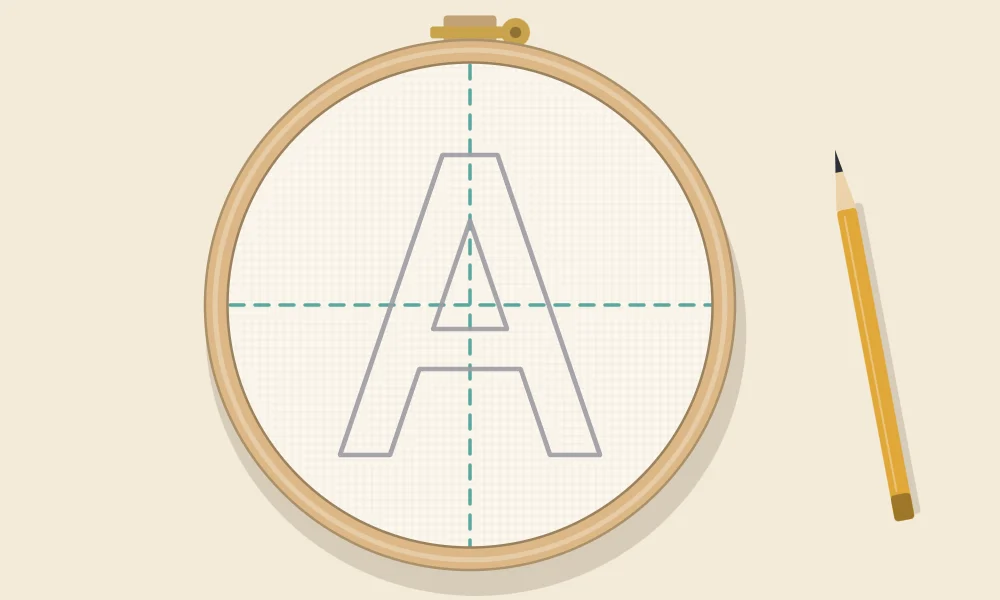
If the fabric is too dark or thick to see through, the other options in how to transfer an embroidery pattern will get the letter onto the cloth.
Outlining the Letter in Backstitch
Use three strands of floss for a line that reads clearly from across a room; two strands give a finer look on a small letter. Cut a length about as long as your forearm.
- Start at the end of a stroke, not in the middle. On an A, the bottom of the left leg is a natural starting point.
- Bring the needle up one stitch length along the line, about 1/8 inch (3 mm), and go back down at the very start of the line.
- Come up one stitch length beyond the first stitch, then go back down into the hole at the end of that stitch. Every stitch shares a hole with its neighbor, so the line has no gaps.
- At each corner, end a stitch exactly on the corner point. A stitch that spans a corner rounds it off.
- On curves, shorten the stitches. Short stitches follow a curve smoothly; long ones turn it into a row of straight segments.
- For a letter with an outline and a crossbar, complete the outer outline first, then the inner shapes and the bar.
- Finish each thread by weaving the tail under several stitches on the back.
The backstitch tutorial has a numbered diagram of the needle movement if the back-and-forth order feels confusing at first.
Tip
Do not carry the thread across the back from one part of the letter to another, for example across the open middle of an O. On light fabric the carried thread can show through from the front. End the thread and start again instead.
Optional: Filling the Strokes With Satin Stitch
The outlined letter is a finished design on its own. If you chose a bold letter and want a solid look, the backstitch outline you have just made doubles as the foundation for a satin stitch fill.
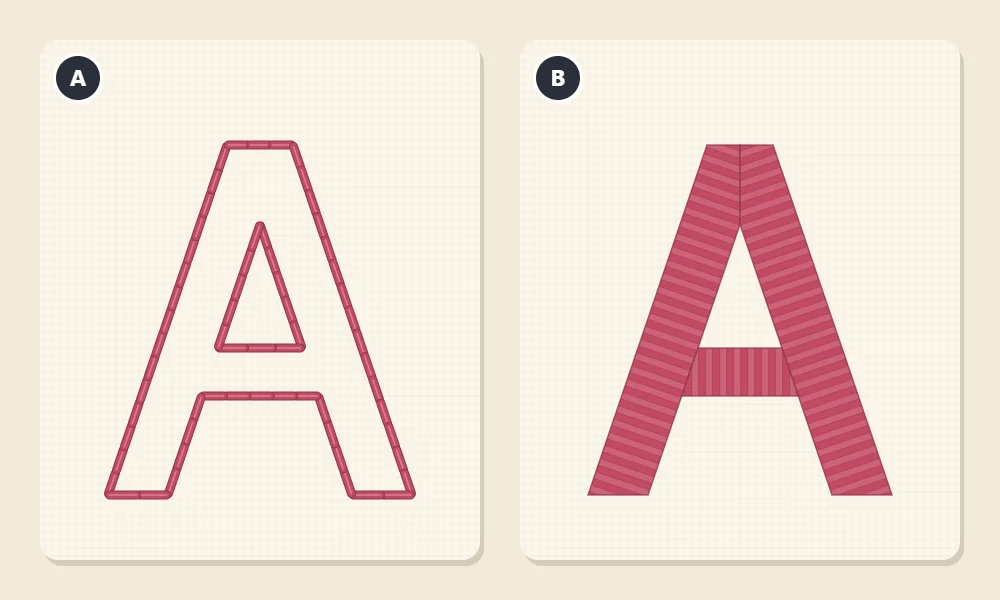
- Switch to two strands; they lie flatter and blend into a smoother surface than three.
- Work one stroke of the letter at a time. Bring the needle up just outside the outline on one side of the stroke and take it down just outside the outline on the other side, so each stitch covers the backstitch and lies straight across the stroke.
- Come up again right next to where the thread first emerged, on the same side, and lay the next stitch snugly beside the first. Always crossing the back in the same direction keeps the tension even.
- Keep every stitch parallel to the last. On a slanted stroke, such as the legs of an A, the stitches stay square to the stroke, so they slant along with it.
Pull each stitch only until it rests on the fabric. Tight satin stitches draw the fabric in and cause wrinkles around the letter. The guide to satin stitch covers smooth edges and coverage in more depth.
Adding the Leaf Sprigs
The sprigs frame the letter and fill the empty sides of the hoop. Use two strands of green.
- Stitch each curved stem in stem stitch or backstitch, working from the bottom of the stem to the tip.
- Add the leaves as single lazy daisy stitches: come up on the stem, go down in the same hole leaving a loop, come up inside the far end of the loop and take a tiny stitch over it to hold it down.
- Angle the leaves upward and outward, and make the ones near the tip slightly smaller.
- Stitch the second sprig as a mirror image of the first so the design looks balanced.
Watch out
If you used a water-soluble pen, remove the marks according to the pen’s instructions before applying any heat. Ironing over some marking inks can make them permanent.
Finishing and Variations
Check the front for any guide lines that still show and remove them as your marking tool allows. Leave the piece in the hoop for display, with the letter upright under the screw, and trim and gather the spare fabric at the back.
- Two colors: outline in a dark shade and fill in a lighter shade of the same color.
- Chain stitch outline: a heavier, more decorative line that suits large, simple letters.
Frequently asked questions
What size should an embroidered initial be?
For a 6-inch (15 cm) hoop, a letter about 3 inches (7.5 cm) tall is a good starting point. It leaves a clear border inside the ring and room for small decorations at the sides.
Which stitch is best for embroidering letters?
Backstitch is the usual first choice because it makes a clean, solid line and handles corners well. Stem stitch and chain stitch also work for larger, flowing letters.
How many strands of floss should I use for a monogram?
Three strands give a bold outline on a 3-inch letter, and two strands give a finer line. For a satin stitch fill, two strands usually lie flatter and smoother.
Can I embroider an initial on a napkin or pillowcase instead?
Yes, the same method works on any plain woven fabric. For items that will be washed, keep satin stitches short, secure the thread ends well and prewash the item before stitching.