Backstitch: How to Embroider Clean Outlines
Backstitch gives a solid, unbroken line for outlines and lettering. Follow the three numbered points, then learn how stitch length controls smooth curves and sharp corners.
Tutorial at a glance
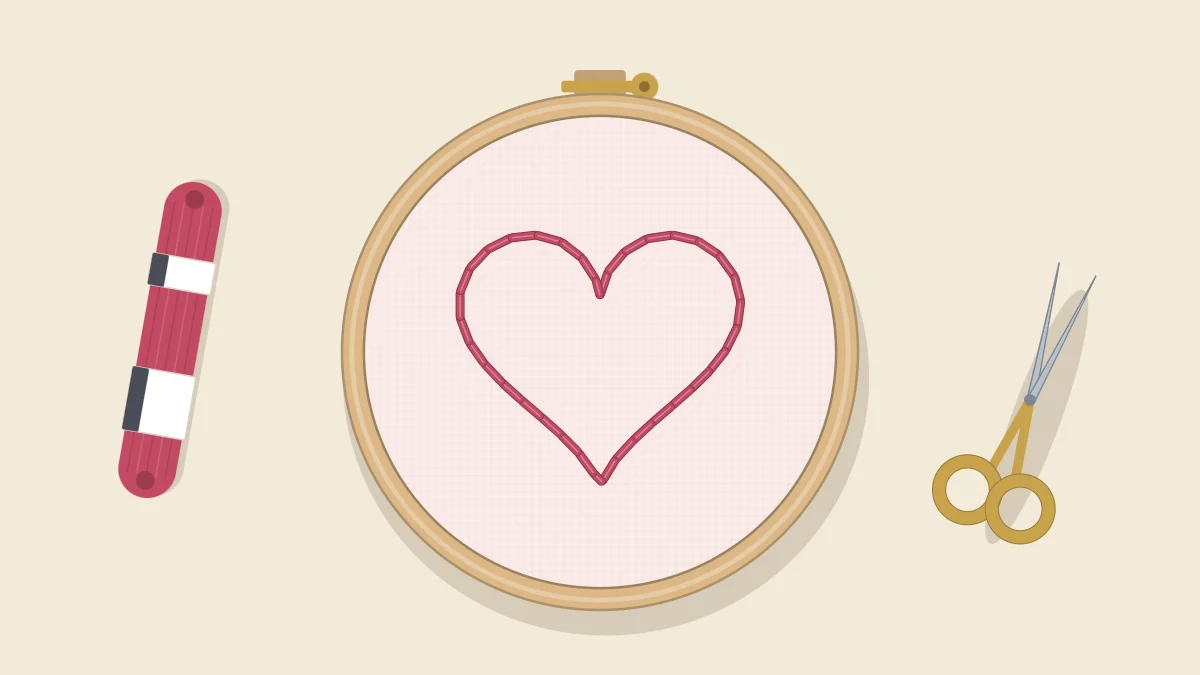
Materials
- Plain woven cotton fabric
- 6-inch (15 cm) embroidery hoop
- Embroidery needle
- Six-strand cotton floss
- Pencil or water-soluble pen
- Small scissors
Backstitch makes a solid, unbroken line, which is exactly what an outline needs. Each stitch travels backward on the surface to meet the one before it, so there are no gaps for the fabric to show through. It is the stitch most patterns mean when they simply say “outline”, and it is the usual choice for stitched lettering.
If you can already work running stitch, you know the hand movement. The only new idea is the direction: the needle comes up ahead of the stitching and goes down behind it.
What You Need
Hoop a piece of plain woven cotton so it is taut, and draw a straight line, a wavy line and a small square with a pencil or water-soluble pen. Thread an embroidery needle with about a forearm’s length of floss. Two strands is a good starting point for outlines; the number of strands changes the weight of the line a great deal, as the guide on how to separate embroidery floss shows.
How to Work Backstitch Step by Step
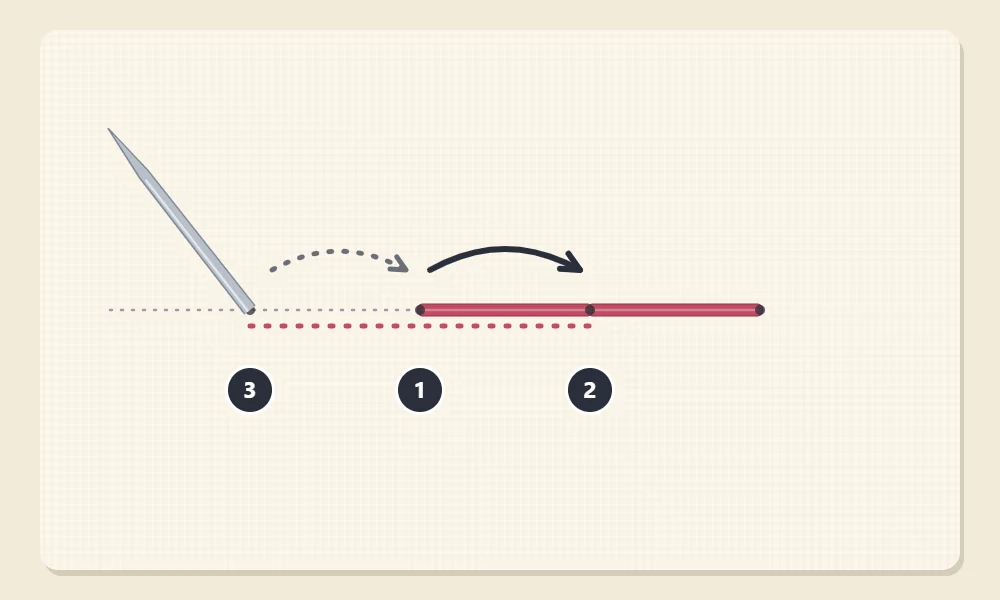
The diagram shows the stitch worked from right to left, which is how most right-handed stitchers do it. If you are left-handed, mirror the directions and work from left to right. The numbers below match the diagram.
- Come up at 1. Do not start at the very end of the line. Bring the needle up one stitch length in from the right-hand end. About 1/8 inch (3 mm) is a good practice length.
- Go down at 2. Take the needle back to the right and push it down at the end of the line. On later stitches, point 2 is the end of the previous stitch. Pull through until the stitch lies flat.
- Come up at 3. On the back of the fabric, pass under point 1 and bring the needle up one stitch length ahead, to the left of 1. The floss is now coming out of the fabric with an empty space behind it.
- Close the space. Take the needle back and down into the same hole at point 1, where the last stitch ended. Using the same hole is what makes the line look continuous.
- Repeat. Come up one stitch length ahead, go back down into the end of the previous stitch, and continue along the line. Every stitch is “one step forward underneath, one step back on top”.
On the back, the stitches overlap and look like a thicker, rope-like line. That is normal and it is why backstitch uses more floss than running stitch.
Choosing a Stitch Length
For straight lines and gentle curves, about 1/8 inch (3 mm) gives a neat line that is still quick to work. Smaller designs and tight curves need shorter stitches. More important than the exact length is consistency: a line of equal stitches looks tidy even when the stitches are fairly long, while mixed lengths look uneven even when the line is perfectly on the mark.
Tip
For your first few rows, mark small dots along the guide line at equal intervals and stitch from dot to dot. After a short time your eye will judge the distance without them.
Curves and Corners
A backstitch is a straight segment, so a curve is built from many short segments. When the stitches are short enough, the eye reads them as a smooth curve. When they are too long, the line turns into a row of visible angles.
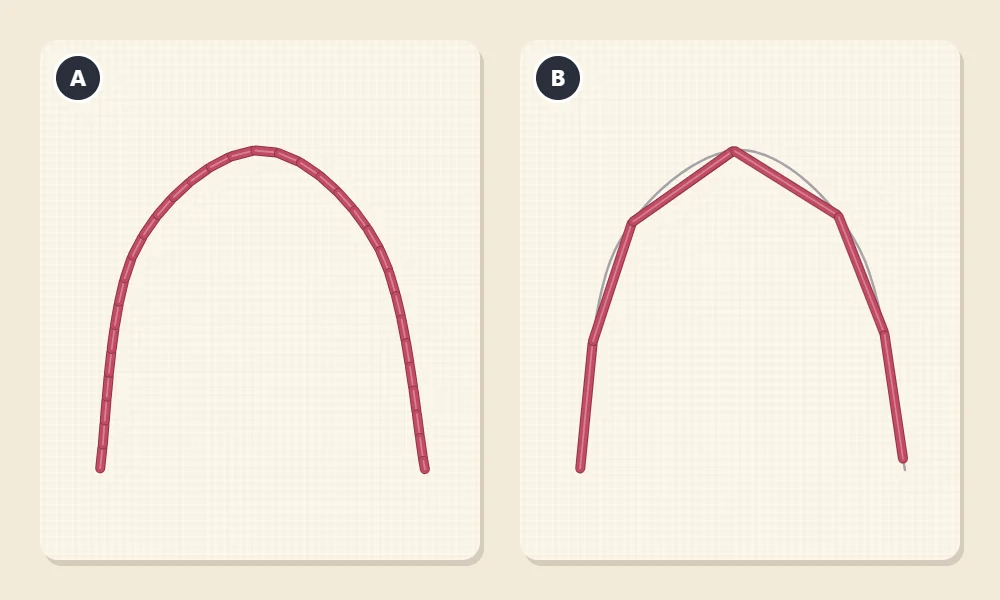
As a rule of thumb, shorten the stitches as the curve tightens. On a small circle or the top of a heart, stitches of about 1/16 inch (2 mm) are not too small. Change the length gradually so there is no sudden jump from long to short.
Corners need the opposite kind of care. A stitch must end exactly at the corner point, so the needle goes down or comes up right on it. If a stitch runs across the corner, the point is cut off and the angle looks rounded. When you see a corner coming, adjust the last two or three stitches slightly so that one of them lands precisely on the point.
Backstitch for Lettering
Letters combine straight strokes, tight curves and sharp corners, which makes them a good test of everything above.
- Use short stitches. Small letters usually need stitches of about 1/16 to 1/8 inch (2 to 3 mm).
- Match strands to letter size. One or two strands suit small handwriting-style text. Larger block letters can take three.
- Follow the pen path. Stitch each letter in the order you would write it, where that is practical, so the joins fall in natural places.
- Do not jump between letters on thin fabric. A dark floss carried across the back can show through as a shadow. End the floss and restart, or weave it through the back of existing stitches to reach the next letter.
- Let stitches meet at crossings. Where two strokes cross, as in a “t” or an “x”, try to have a stitch end at the crossing point.
A single large letter is a satisfying first lettering project. The embroidered initial hoop walks through sizing, tracing and outlining one.
Common Problems and Fixes
- Small gaps between stitches. The needle is going down beside the end of the previous stitch instead of into the same hole. Aim for the hole itself.
- A wobbly line. The needle is drifting off the guide line. Bring it up and take it down exactly on the mark, and redraw the line if it has faded.
- Split or fuzzy stitches. The needle is piercing the floss of the previous stitch. Slide the tip in beside the floss, into the hole, not through the strands.
- Puckered fabric. The floss is pulled too tight. Stop pulling when the stitch lies flat, and check that the fabric is tight in the hoop.
- A bumpy, thick line. Too many strands for the scale of the design. Drop to two strands, or one for fine detail.
- Stitches of different lengths. Go back to dots for a while, or use the needle’s eye as a measuring guide.
Many of these are the same slips covered in common embroidery mistakes, and they are easy to correct once you know what to look for.
When to Choose Backstitch
Use backstitch when you want a crisp, flat line: outlines of shapes, lettering, fine details such as veins on a leaf, and straight borders. It also makes a firm edge to stitch over when you fill a shape. For flowing stems and vines where you want a slightly raised, twisted line, stem stitch is the usual alternative and is a natural stitch to learn next.
Frequently asked questions
Which direction do you work backstitch?
Right-handed stitchers usually work from right to left and left-handed stitchers from left to right. Either way, the needle comes up ahead of the stitching and goes back down into the end of the previous stitch.
How long should backstitches be?
About 1/8 inch (3 mm) is a good general length. Shorten the stitches on tight curves and small lettering so the line stays smooth.
Why are there gaps in my backstitch line?
The needle is going down next to the previous stitch rather than into the same hole. Aim for the exact hole where the last stitch ended.
Is backstitch or stem stitch better for outlines?
Backstitch gives a flat, crisp line that suits lettering, corners and geometric shapes. Stem stitch gives a slightly raised, rope-like line that suits flowing stems and curves.