Chain Stitch: Step-by-Step for Beginners
Chain stitch makes a bold line of linked loops. Learn how to form each link, keep the loops even, anchor the last one, work curves and use rows of chain as a filling.
Tutorial at a glance
Materials
- Plain woven cotton fabric
- 6-inch (15 cm) embroidery hoop
- Embroidery needle
- Six-strand cotton floss
- Pencil or water-soluble pen
- Small scissors
A row of chain stitch looks like the links of a fine chain: each loop of floss is caught and held open by the next one. It makes a bold, textured line that is wider than backstitch or stem stitch, it bends easily around curves, and worked in rows it can fill a whole shape. The stitch introduces one new skill, which is leaving a loop on the surface and catching it with the needle.
What You Need
Hoop a piece of plain woven cotton so it is taut and draw a straight line, a long curve and a spiral about 2 inches (5 cm) across. Three strands of floss is a good starting point, because the links are easier to see and shape with a little body. Cut the floss about as long as your forearm; chain stitch uses floss quickly, but a longer thread tangles as each loop is formed.
How to Work Chain Stitch Step by Step
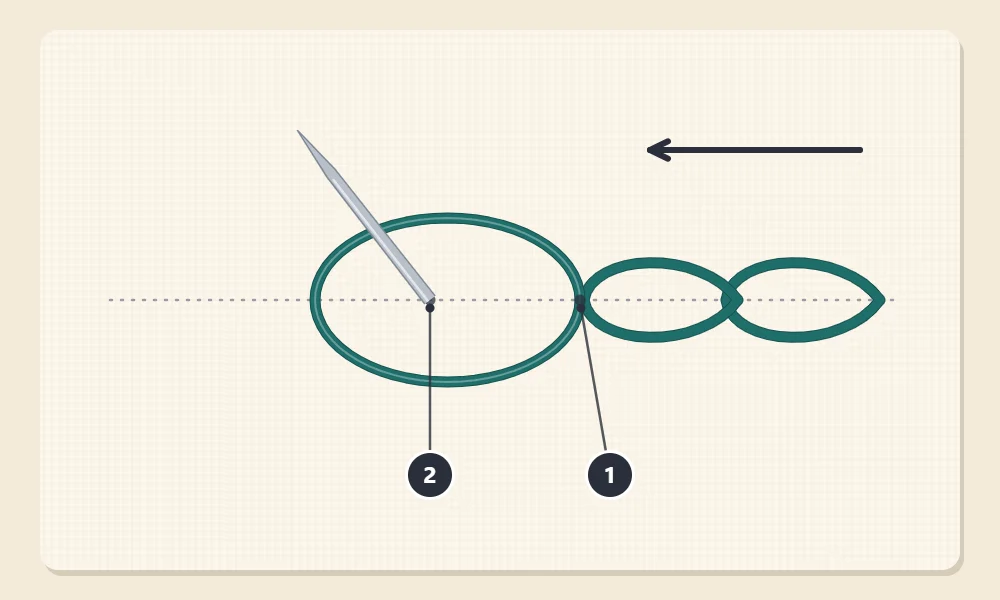
You can work toward yourself, away from yourself or sideways. Many stitchers find it easiest to turn the hoop so they are stitching toward themselves. The numbers match the diagrams.
- Come up at 1. Bring the needle up from the back at the start of the line and pull the floss all the way through.
- Go back down at 1. Push the needle down into the same hole it came out of, or a single fabric thread beside it. Pull the floss through slowly and stop while there is still a loop lying on the surface.
- Come up at 2, inside the loop. Bring the needle up on the line one stitch length ahead. About 1/8 to 3/16 inch (3 to 5 mm) is a good practice length. Make sure the needle tip comes up inside the loop, so the loop of floss lies under and around the needle.
- Tighten gently. Pull the floss through until the loop closes around the thread at 2 and lies flat as a rounded link. Stop there. If you keep pulling, the link shrinks to a tight line.
- Start the next link. Go back down at 2, inside the link you have just made, in the same hole the floss is coming out of. Leave a loop, come up one stitch length ahead inside it, and tighten gently.
- Repeat along the line. Every new link begins inside the previous one. That is what joins them into a chain.
Tip
If the loop twists or collapses before you can catch it, hold it down against the fabric with the thumb of your other hand until the needle is up through point 2.
How to Anchor the Last Loop
The final link has no following link to hold it, so it needs a small stitch of its own. After you have tightened the last loop, the floss is coming up inside its tip. Take the needle down at point 3, just on the other side of the loop, so a tiny stitch crosses over the tip and pins it to the fabric. Then secure the floss on the back.
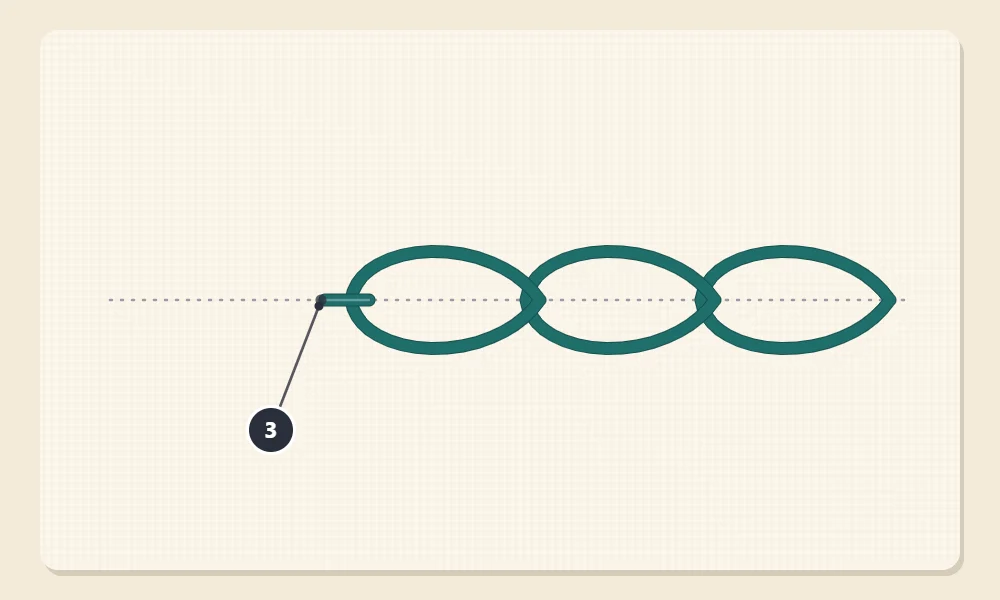
Keep this anchoring stitch very short. A long one looks like a tail hanging off the end of the chain. The same small stitch is used whenever you need to end a chain partway, for example when the floss runs out. To carry on with a new thread, bring it up inside the tip of the last link, right beside the anchoring stitch, and continue as if nothing had happened.
A single link anchored this way, standing on its own, is a detached chain stitch. That is the basis of lazy daisy stitch, which uses one loop for each petal.
Keeping the Loops Even
A chain looks neat when every link is the same length and the same roundness. Three habits make the difference.
- Measure each step forward. The distance from where you go down to where you come up sets the length of the link. Mark dots along the line for your first rows if you find the lengths drifting.
- Pull every loop by the same amount. Stop as soon as the loop rests against the floss. Loops pulled tight become thin and pinched, and loose ones flop and can catch on things. The guide to embroidery thread tension explains how to judge that stopping point.
- Go down inside the link every time. If the needle goes down outside the previous link, the chain breaks at that point and the links no longer connect.
Watch out
Check that the loop is under the needle before you pull through. If the needle comes up outside the loop, the whole loop disappears to the back of the fabric and you are left with nothing on the surface. Simply come back up at the same point and form the loop again.
Working Curves and Spirals
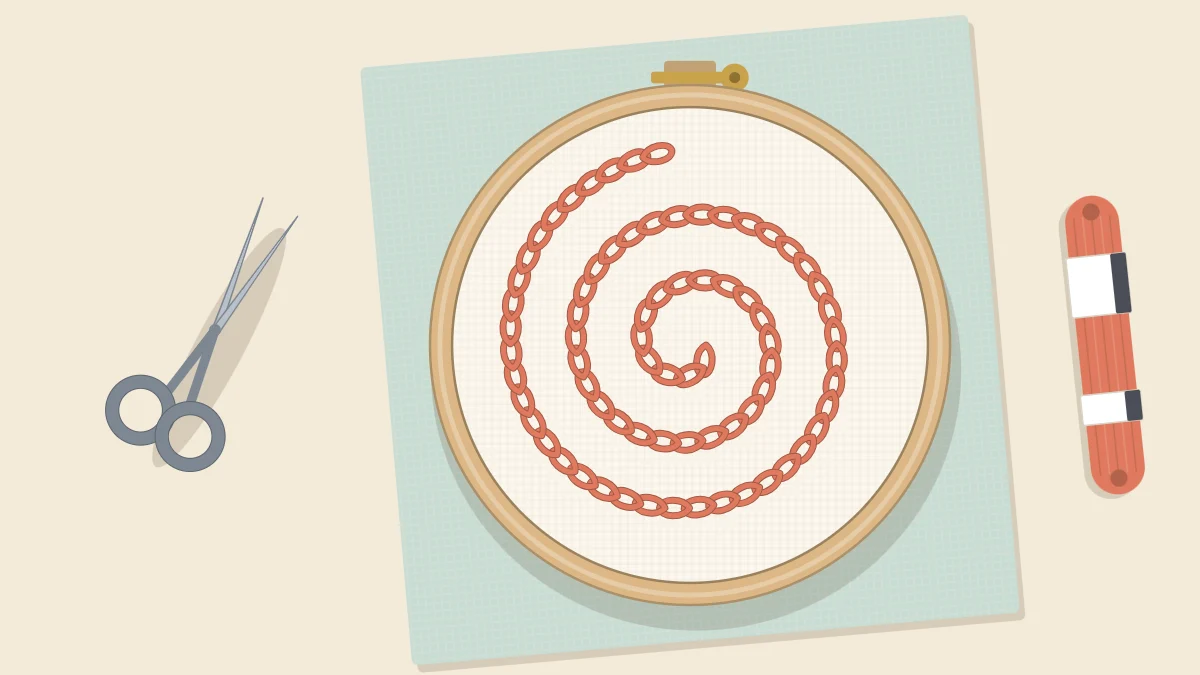
Chain stitch follows curves well because each link can sit at a slightly different angle from the last. On gentle curves, stitch as usual. On tight curves, shorten the links so they do not cut across the bend, and turn the hoop as you go so you are always stitching in the direction that feels comfortable. For a spiral, start at the center, where the curve is tightest, with very short links and let them lengthen as the spiral opens out.
To make a sharp corner, do not try to bend a link around it. Anchor the last link at the corner point with a tiny stitch, then start a new chain from inside that link, heading in the new direction.
Using Chain Stitch as a Filling
Because the line is wide, rows of chain stitch placed side by side cover fabric quickly and give a soft, knitted-looking texture. There are two common approaches.
- Follow the outline inward. Stitch around the edge of the shape first, then work another row just inside it, and keep going round until you reach the middle. This suits circles, leaves and hearts.
- Work straight rows. Stitch back and forth in parallel lines, all in the same direction so the links point the same way. This suits squares, bands and letters.
In both cases, set each row close enough to touch its neighbor so no fabric shows between them. Chain stitch filling is much more forgiving than satin stitch on larger shapes, because no single stitch is long enough to sag.
Where to Use Chain Stitch
Use it wherever you want a line with presence: bold outlines, thick stems and branches, borders, large lettering and decorative swirls. Where a design needs a finer line, stem stitch or backstitch is a better fit, and mixing a heavy chain with finer lines adds contrast to a simple design.
A good way to practice is to give chain stitch its own row on a first embroidery sampler, next to the other line stitches, so you can compare their weight and texture.
Frequently asked questions
How do you end a row of chain stitch?
Make a tiny straight stitch over the tip of the last loop, taking the needle down just outside it. This anchoring stitch holds the final link in place.
Why do my chain stitches look thin and tight?
The loops are being pulled too far. Stop pulling as soon as each loop rests against the thread, so the link stays rounded.
Can chain stitch be used to fill a shape?
Yes. Work rows of chain stitch side by side, either following the outline inward or in straight parallel lines, close enough that no fabric shows between them.
How do I continue a chain when the thread runs out?
Anchor the last loop with a tiny stitch and secure the thread on the back. Bring the new thread up inside the tip of that last link and carry on.