How to Thread an Embroidery Needle (Without the Frustration)
A clean cut, a needle that fits the thread and the pinch-and-fold method get floss through the eye on the first try. Also: how long a tail to leave and why embroidery thread is not doubled.
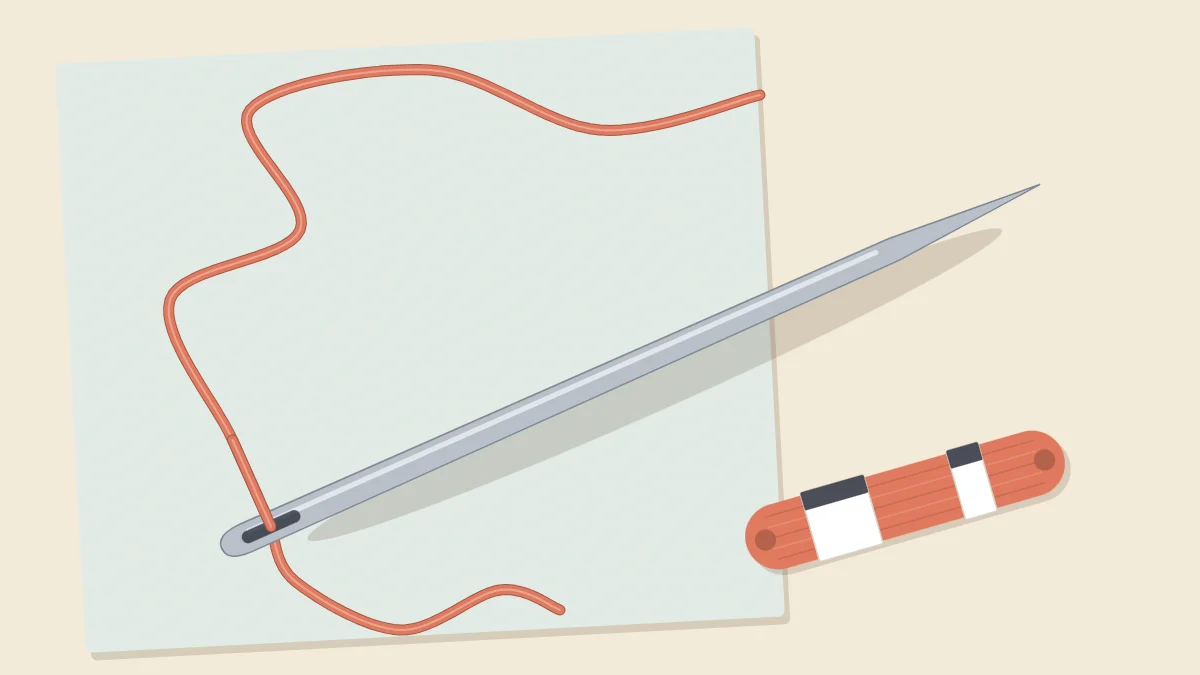
Embroidery floss is soft, loosely twisted and made of several strands, which is exactly what makes it stubborn at the eye of a needle. One strand slips through, the others splay sideways, and the end gets fuzzier with every attempt. The fix is rarely better eyesight. It is a clean cut, a needle whose eye suits the thread and a method that sends a firm fold through the eye instead of a frayed tip.
Start With a Clean Cut
A ragged end will not go through any eye, however large. Before threading, trim about a quarter inch (6 mm) off the end with small, sharp scissors so that all the strands finish at the same point. Cutting at a slight angle gives the end a narrow tip, which helps with a small eye.
If the end frays while you are trying, do not keep pushing it. Snip it off and start again with a fresh end. Each failed attempt splits the fibers further, so a new cut is quicker than persistence.
It also helps to prepare the thread first. Cut a length about as long as your forearm, roughly 18 inches (45 cm), and divide it into the number of strands you plan to use. The guide to separating embroidery floss shows how to do that without tangles.
Check That the Needle Fits the Thread
Embroidery needles, also called crewel needles, have a long oval eye made for stranded thread. They come in numbered sizes, and the higher the number, the finer the needle and the smaller the eye. If two or three strands will not go through after a couple of careful tries, the needle is probably too fine for that thread.
The eye should be just large enough for the thread to pass through without a struggle. An eye that is much too large leaves a visible hole in the fabric, while one that is too small wears the thread thin where it rubs. The guide to embroidery needles explains how to match sizes to strand counts.
The Pinch-and-Fold Method
This method works because a folded thread has no loose ends to splay. You push a tight, flat loop through the eye instead of a tip. It is reliable for anything from one strand to all six.
- Hold the needle in your dominant hand. Lay the thread over the shaft of the needle about an inch (2.5 cm) from the thread’s end and fold it down tightly around the needle, as in panel A.
- With the thumb and forefinger of your other hand, pinch the fold hard, right against the needle.
- Slide the needle out of the fold without relaxing the pinch. You should have a tiny, flattened loop held between your fingertips, with only a sliver of it showing.
- Turn the needle so the eye faces the loop and press the eye down over it, as in panel B. Think of moving the needle onto the thread, not the thread into the needle.
- When the loop pokes out on the other side of the eye, catch it and pull until the short end comes all the way through.
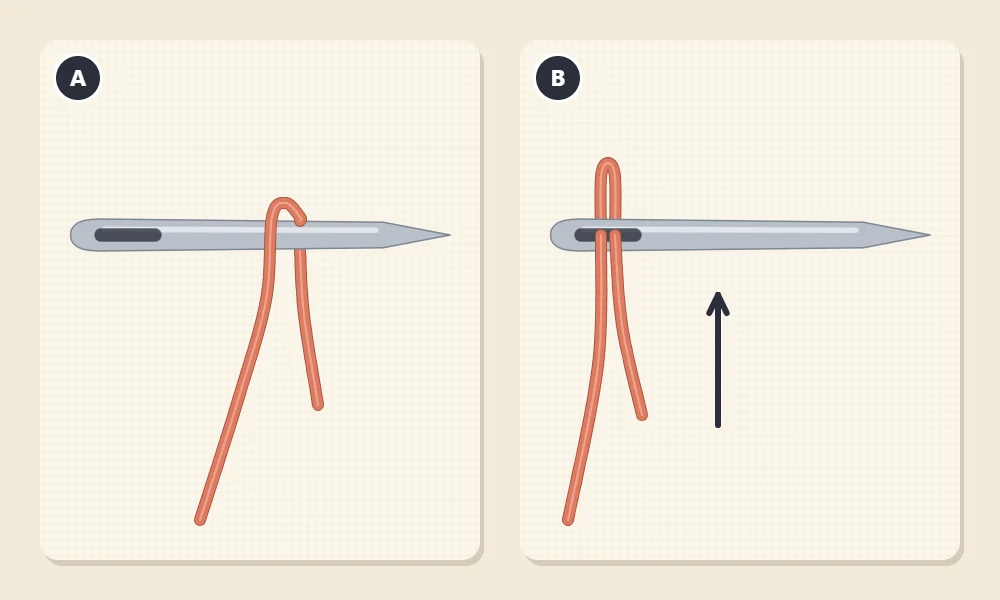
The harder you pinch, the flatter the loop and the easier it passes. If the loop will not go through at all, the folded thread is simply too thick for that eye, and a larger needle is the answer.
Tip
Hold the needle in front of something plain and pale, such as a sheet of white paper. The eye is far easier to see against a clear background than against a patterned tablecloth.
Other Ways to Get the Thread Through
Flatten the End
For one or two strands, a freshly cut end pinched flat between finger and thumb often goes straight in. Many stitchers dampen the tip slightly so the strands cling together. Keep the pinch close to the tip, with only a tiny length of thread showing, so the end has no room to bend away.
Use a Needle Threader
A needle threader is a thin wire loop on a small handle. It is useful with fine needles, in low light or for anyone who finds close work tiring.
- Push the wire loop through the eye of the needle.
- Pass the end of the thread through the wire loop and pull a few inches through.
- Pull the threader back out of the eye. The wire loop draws the thread through with it.
The wire is delicate, so do not force it through an eye that is too small or drag a thick bundle of strands back through. A threader is one of the optional extras described in embroidery tools for beginners.
How Long a Tail to Leave
Once the thread is through, you have two ends. The short one is the tail, numbered 1 in the diagram, and it simply hangs loose beside the needle. The long one, numbered 2, is the working end that does the stitching and is anchored in the fabric.
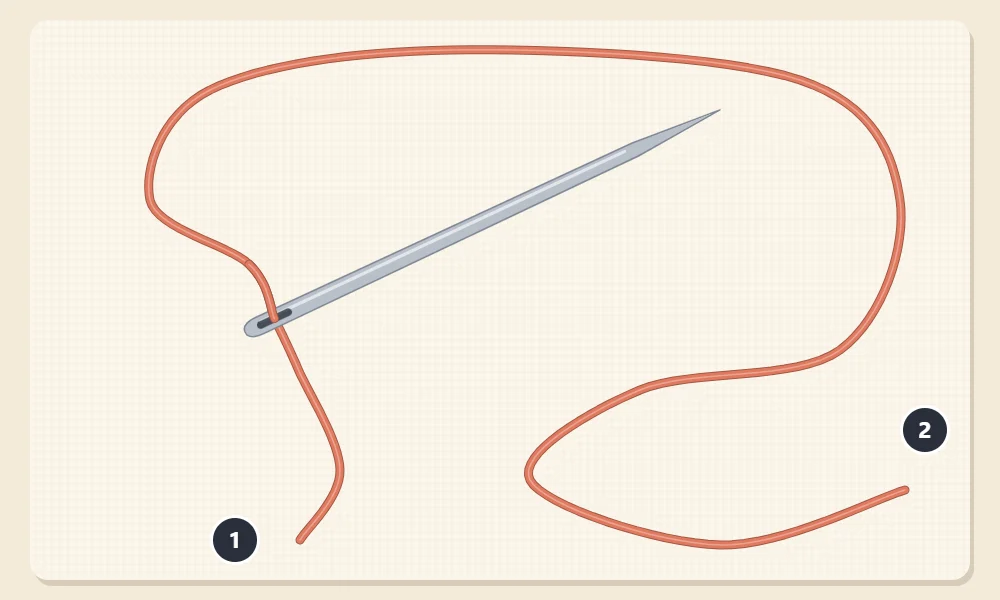
A tail of about 3 to 4 inches (8 to 10 cm) is a good starting point. Much shorter and the needle slips off the thread every few stitches. Much longer and the tail gets pulled through the fabric alongside the working end, which wastes thread and roughens it.
As you stitch, slide the needle a little along the thread from time to time. The thread wears where it bends through the eye, and moving the needle spreads that wear instead of letting one spot grow thin and fuzzy.
Why the Thread Is Not Doubled
In ordinary hand sewing, the thread is often folded in half and both ends are knotted together. For most embroidery, the thread is used single: one end is anchored, and the tail stays free.
- Thickness is set by strand count. A pattern that calls for two strands means two strands through the needle with a loose tail. Doubling them would put four strands in every stitch.
- Mistakes are easier to undo. With a free tail, you can slip the needle off the thread, ease out a wrong stitch and rethread. A doubled, knotted thread has to be cut.
- The strands lie flatter. Doubled thread tends to twist around itself, and one half often ends up looser than the other, leaving small loops on the surface.
Watch out
If your stitches look twice as heavy as the pattern photo, check the tail. It is easy to catch it in a stitch by accident and carry on with a doubled thread without noticing.
When It Still Will Not Go Through
- Turn the needle around. The eye of a needle is often slightly smoother and more open on one side than the other. Try threading from the opposite side.
- Recut the end. A fresh cut solves most problems.
- Reduce the strands or change the needle. If four strands will not pass through, move up to a larger needle instead of forcing them.
- Shorten the thread. A very long length is awkward to control at the tip and tangles later, one of the common beginner mistakes that is easy to avoid.
With the needle threaded and the tail in place, the working end needs anchoring before the first stitch. The options, from a simple knot to a waste knot, are covered in how to start and end embroidery thread.
Frequently asked questions
Why does my embroidery floss keep fraying when I thread the needle?
The end has been pushed against the eye too many times, or it was cut with dull scissors. Trim a fresh end with sharp scissors and try again, or fold the thread and push the fold through instead.
Should I knot both ends of the thread together?
Not for most embroidery. Only the long working end is anchored, and the short tail hangs free, so the stitch thickness matches the number of strands you chose.
Why does my needle keep coming unthreaded?
The tail is usually too short. Leave about 3 to 4 inches (8 to 10 cm) past the eye, and lightly hold the thread at the eye with your fingers as you pull each stitch through.
Is it fine to use a needle threader for embroidery floss?
Yes. A wire-loop threader works well with one to three strands in a suitably sized needle. Do not force it through a very small eye, because the fine wire bends and breaks easily.