Embroidery Tools for Beginners: What You Need and What Can Wait
A first embroidery kit needs only six things. Here is the short essential list, why small sharp scissors and a good marking tool matter, and which extras can wait until you need them.
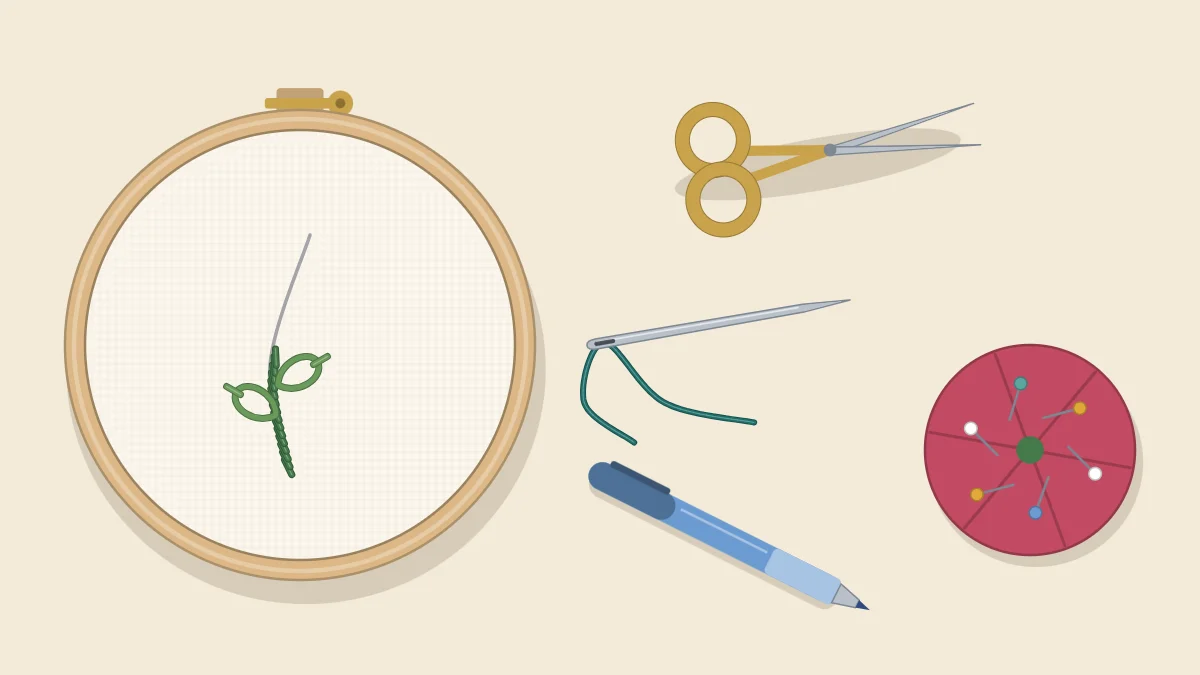
Everything you need for a first embroidery session fits in a pencil case. The craft has a long list of gadgets, and nearly all of them solve problems you will not have for months. Sorting the list into “needed now” and “can wait” keeps a first kit small, and it means that when you do add a tool later, you know exactly which annoyance it is meant to fix.
The Short Essential List
Six things are enough to stitch a complete piece:
- A hoop. It holds the fabric taut so stitches lie flat. A 5 or 6-inch (13 to 15 cm) hoop suits most beginner designs and is comfortable to hold. The differences between materials and sizes are covered in how to choose an embroidery hoop.
- Needles. One mixed packet of embroidery needles, so you can change size when you change the number of strands. The embroidery needles guide explains how the sizes run.
- Fabric. A plain, light-colored, medium-weight woven cotton or cotton-linen blend. See the notes on the best fabric for embroidery if you are choosing from a scrap pile.
- Floss. A few skeins of six-strand cotton floss in colors you like together.
- Small sharp scissors. For cutting thread cleanly and close to the fabric.
- Something to mark with. A pencil or an erasable fabric pen for drawing or tracing the design.
That is the whole kit. The two items people most often try to improvise, scissors and marking tools, are the two worth getting right, so they get their own sections below.
Why Small Sharp Scissors Matter
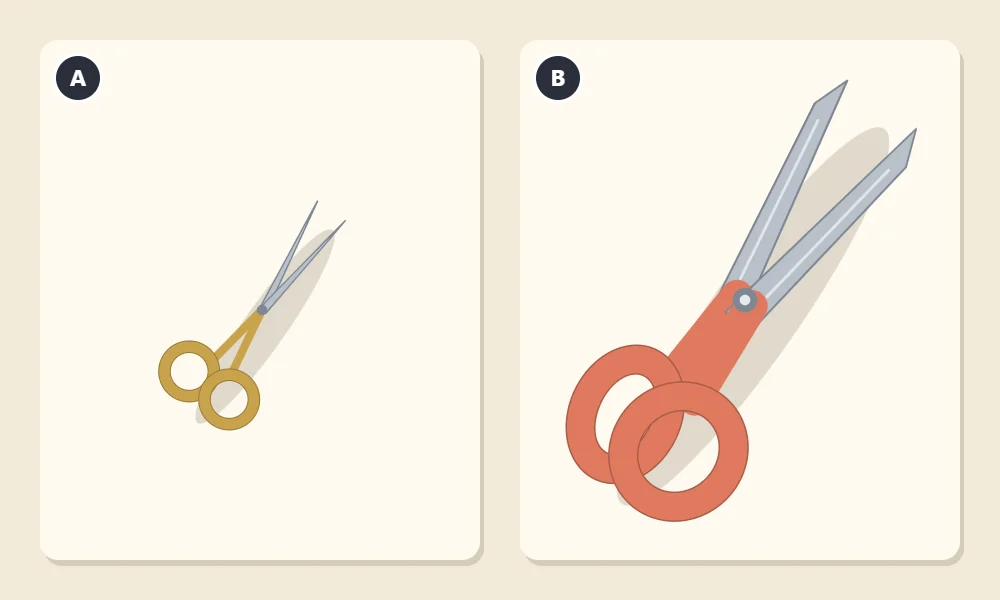
Pair A in the picture is a typical pair of embroidery scissors: short blades, usually 3 to 4 inches (about 8 to 10 cm) overall, ending in fine points. Pair B is the kind of household scissors found in a kitchen drawer. Both will cut floss, but they do not do it equally well, for three reasons.
- A clean end threads easily. Sharp, fine blades slice floss straight across. Dull or bulky blades chew it, leaving a frayed tuft that refuses to go through a needle’s eye.
- Fine points get close. Trimming a thread tail on the back of your work means cutting within a fraction of an inch of the fabric. Narrow points let you see what you are cutting. Wide blades hide the spot and make it easy to nick the fabric or a neighboring stitch.
- Fine points fit under stitches. When a stitch has to come out, you slide one point under it and snip. Large blades simply do not fit.
Keep embroidery scissors for thread only. Cutting paper, tape or packaging dulls the blades quickly, and a dull pair loses the clean cut that made it worth having. Use the household pair, B, for cutting fabric to size and for everything else.
Watch out
Embroidery scissors have very sharp points. Store them in a sheath or a closed case, and keep them and your needles out of reach of young children.
Marking Tools: Three Common Choices
You need a way to put the design on the fabric, and the mark has to stay visible while you stitch and then disappear or stay hidden afterward. The three tools most beginners choose between are numbered below.
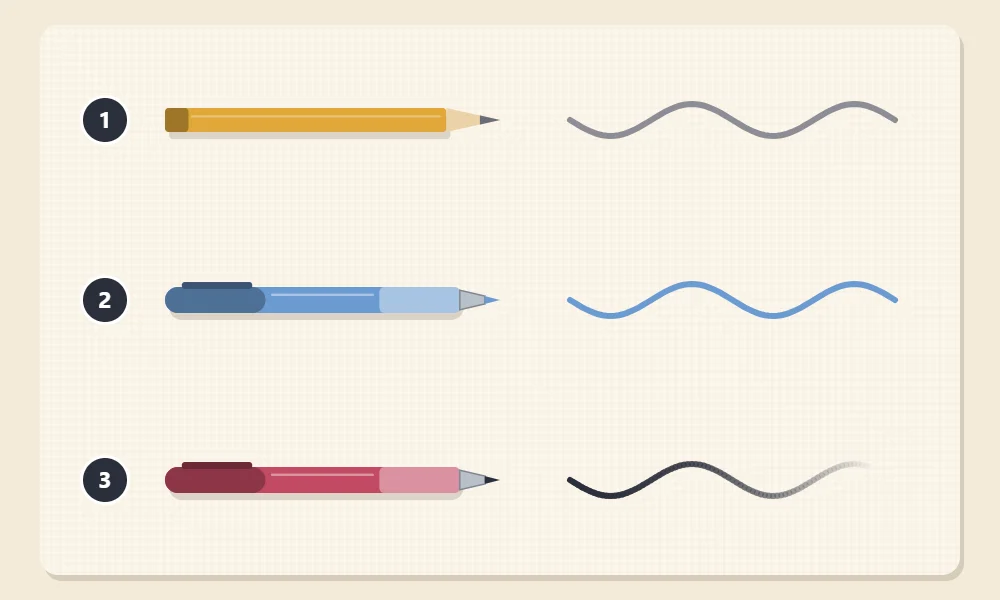
| Tool | Line | How It Is Removed | Keep in Mind |
|---|---|---|---|
| 1. Pencil | Fine grey | Usually it is not; the stitches cover it | Draw lightly and stitch right on the line, because pencil can be hard to wash out |
| 2. Water-soluble pen | Blue, easy to see on light fabric | Rinsed away with cool water | The finished piece must be able to get wet; heat may set the ink, so rinse before ironing |
| 3. Heat-erasable pen | Dark, fades with warmth | Warmth from an iron or hair dryer | Marks can faintly reappear in the cold or leave a pale trace on some fabrics |
A sharp, ordinary pencil (1) is a perfectly good first choice. The line is thin and precise, and it does not vanish halfway through a project. Its weakness is that it is close to permanent, so it only works if every line ends up under thread.
A water-soluble pen (2) is forgiving, because lines you decide not to stitch can be rinsed out. It suits projects that will be washed anyway. A heat-erasable pen (3) removes fastest, which is useful for pieces that will stay framed in a hoop and never be soaked.
Whichever you use, test it first. Draw a short line on a scrap or a hidden corner of the same fabric, remove it the way you plan to, and look at the result in good light. Inks behave differently on different fibers and dyes. The ways to get a printed design onto fabric with these tools are set out in how to transfer an embroidery pattern.
Tools That Can Wait
None of these is needed to start. Each one answers a specific irritation, so wait until you feel that irritation.
- Needle threader. A small tool that pulls thread through the eye. Worth having if threading is slow or your close vision is not what it was. Many needle packets include one.
- Thimble. Protects the finger that pushes the needle. Most light embroidery on cotton does not need one; consider it if a fingertip gets sore, or on heavy fabric.
- Needle minder. A small magnet that sits on your fabric and holds the needle when you put the work down. A pincushion or a scrap of felt does the same job.
- Pincushion and pins. Handy for parking needles and for holding a pattern in place while tracing.
- Light source for tracing. A lightbox makes tracing easier, but a sunny window works well.
- Hoop stand. Holds the hoop so both hands are free. Useful for long sessions, unnecessary for learning stitches.
- Seam ripper. Helps with removing stitches, though fine-pointed scissors usually manage.
Keeping Floss and Tools Tidy
Storage is the one “later” item that becomes urgent quickly, because loose skeins tangle. A simple system is enough:
- Keep the paper bands on each skein as long as you can. The color number is printed there, and you will want it when you need more of the same shade.
- When a skein starts to fall apart, wind it onto a card or plastic bobbin and write the color number on it.
- Store bobbins or skeins in a divided box or in small resealable bags, grouped by color family.
- Keep leftover cut lengths together on a labeled card or ring rather than loose in the box.
Tip
Keep the working kit for your current project in one pouch: hoop, needles in a felt scrap, scissors, marking tool and the skeins in use. Having it all in one place makes it far more likely that you pick the work up for ten spare minutes.
For more on thread itself, including how to pull a length from a skein without creating a knot, see the embroidery floss guide.
Frequently asked questions
Do I need a thimble for hand embroidery?
Usually not at first. Light stitching on cotton rarely needs one, but a thimble helps if the finger that pushes the needle gets sore or if you work on heavy fabric.
Can I use regular scissors for embroidery?
Household scissors are fine for cutting fabric to size. For thread, small scissors with fine points give a cleaner cut and let you trim close to the fabric without nicking it.
Which marking tool is safest for a first project?
A lightly used sharp pencil is reliable as long as your stitches cover every line. If you may change the design, a water-soluble pen is more forgiving, but test it on a scrap of the same fabric first.
How should I store embroidery floss?
Keep the paper bands on skeins while you can, then wind loose floss onto labeled bobbins. A divided box or small resealable bags sorted by color keeps it from tangling.