How to Wash and Iron Hand Embroidery Safely
Test for color bleed, wash by hand in cool water with mild soap, roll the piece in a towel and press it face down on a soft base. A cautious routine for cleaning finished embroidery.
By the time a piece is finished it has usually picked up pencil or pen lines, a ring of hoop creases and a little oil from your hands. A gentle wash and a careful press remove most of that. The method below is the one commonly taught for cotton floss on cotton or linen fabric, but every fabric and thread behaves a little differently, so read the care labels and test before you put the whole piece in water.
Check Before You Wash
Three checks take a few minutes and prevent most disappointments.
- Care labels. Look at the label or band of your floss and any care information that came with your fabric. If either one says not to wash, or gives a temperature limit, follow it. Wool, silk, metallic and hand-dyed threads often need different care from cotton floss.
- Color bleed. Dampen a white cloth or a cotton swab with cool water and press it for several seconds against each thread color on the back of the work, especially reds, dark blues and blacks. If any color transfers, do not soak the piece.
- Loose ends. Turn the piece over and make sure every thread tail is secured. Washing can work a loose tail free.
A passed bleed test lowers the risk; it is not a guarantee. Dye can still run in a longer soak, which is why the wash itself is kept short and cool. If your fabric was not prewashed, it may also shrink slightly, and that can tighten the fabric around the stitches.
Watch out
If the test shows color coming off, skip the wash. Spot-clean marks away from the stitching with a barely damp cloth instead, or leave the piece as it is.
Remove Pattern Marks First
How the design was drawn on decides what happens next. Whatever tool you used, follow the instructions that came with it, and deal with the marks before any heat touches the fabric.
| Marking Tool | Usual Way to Remove It | Caution |
|---|---|---|
| Water-soluble pen | Rinse in plain cool water until the lines are gone | Rinse before ironing and before using soap; heat or soap may make the marks harder to remove |
| Heat-erasable pen | The lines fade with the warmth of an iron or a hair dryer | The marks can reappear in very cold conditions, and may leave a faint trace on some fabrics |
| Pencil | May lighten with washing, but often does not disappear completely | Best prevented: draw lightly and cover the lines with stitches |
| Water-soluble stabilizer | Soak in water as the product instructions describe until it dissolves | Rinse thoroughly so no stiff residue is left in the stitches |
If you are still choosing a marking method for a future project, the guide to transferring an embroidery pattern compares them, including which ones wash out most easily.
How to Hand Wash Embroidery
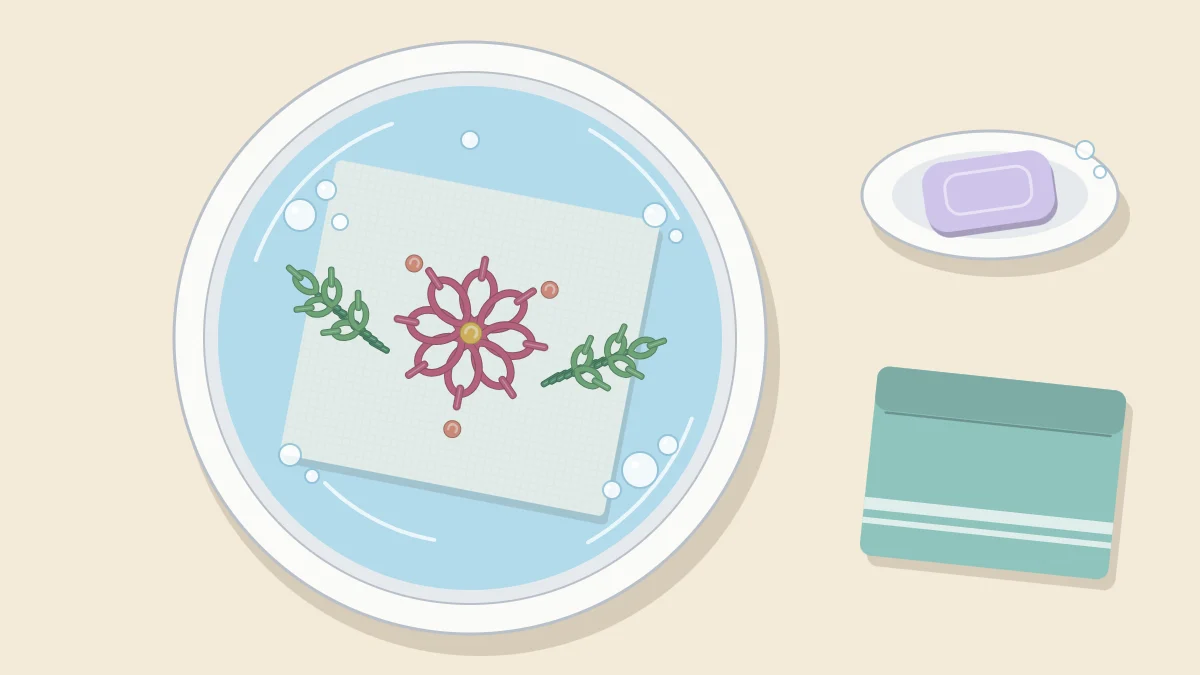
Take the piece out of the hoop first. Use a clean basin or sink and a mild soap with no bleach, whiteners or stain-removing additives; a small amount of gentle dish soap or a soap made for delicate fabrics is the usual choice.
- Fill the basin with cool water and mix in a few drops of soap before the embroidery goes in.
- Lower the piece into the water and press it under gently. Let it soak for a few minutes rather than a long time.
- Swish it slowly. If there is a dirty patch on the plain fabric, pat it with a fingertip. Do not scrub, and do not rub the stitches.
- Watch the water. If it starts to tint with a thread color, lift the piece out and rinse it at once under cool running water, and keep rinsing until the water runs clear. Do not leave it sitting wet in a heap, because that is when loose dye settles into the fabric.
- Drain the basin and rinse the piece in fresh cool water, changing it until no soap remains.
- Lift the embroidery out, supporting its weight with both hands. Never wring or twist it.
Machine washing is harder on hand embroidery than a basin. For decorative hoop pieces, hand washing is the safer habit. Items made to be used, such as an embroidered tea towel, are stitched with laundering in mind, and that article covers how to plan for it.
Dry It Without Wringing
Wringing stretches the weave and crushes the stitches, so the water is pressed out instead.
- Lay a clean, light-colored towel flat.
- Place the damp embroidery on it, face up and smoothed out.
- Roll the towel up from one end with the embroidery inside, and press along the roll with your hands. Do not twist it.
- Unroll, lift the piece off and lay it flat on a dry towel or a drying rack, out of direct sun.
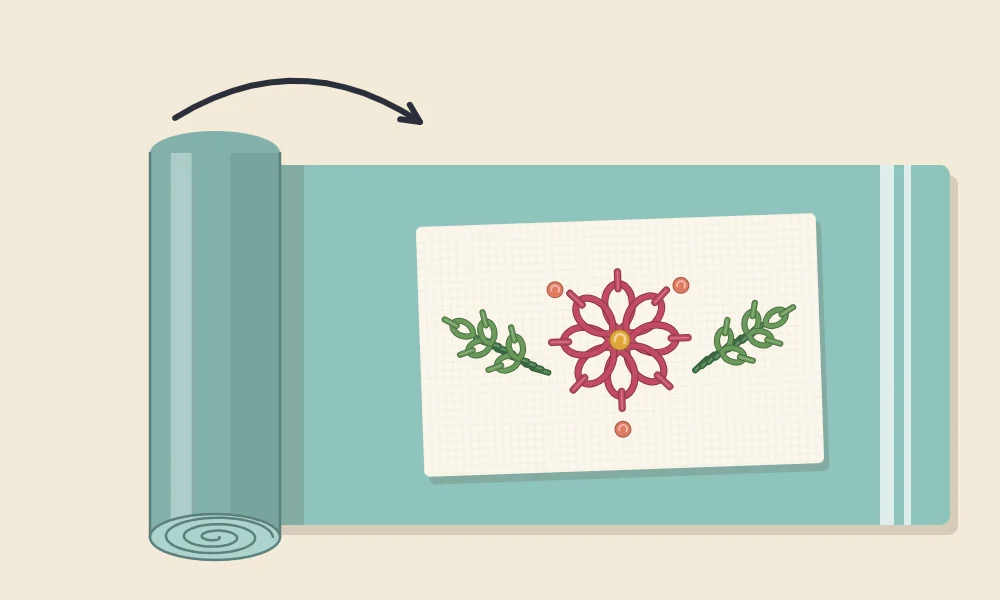
Leave it until it is only slightly damp. That is the best moment to press, because the fibers relax more easily than when they are bone dry.
How to Iron Embroidery
The aim is to flatten the fabric while leaving the stitches raised. Pressing from the front, straight onto a hard board, does the opposite: it squashes knots and satin stitches flat and can leave them shiny. So the embroidery is pressed from the back, on something soft. Build the layers in the order shown in the picture.
- Lay a folded towel on the ironing board (layer 1). A thick, soft towel gives the stitches somewhere to sink into.
- Place the embroidery on it face down (layer 2) and smooth it flat with your hands.
- Cover it with a thin pressing cloth (layer 3), such as a piece of plain white cotton.
- Set the iron to the temperature suited to your fabric, according to its care information. If you are unsure, start low and raise it gradually.
- Press down, lift, and move to the next area. Avoid sliding the iron back and forth, which can drag the fabric out of shape.
- Work from the center outward, then let the piece cool flat before you move it.
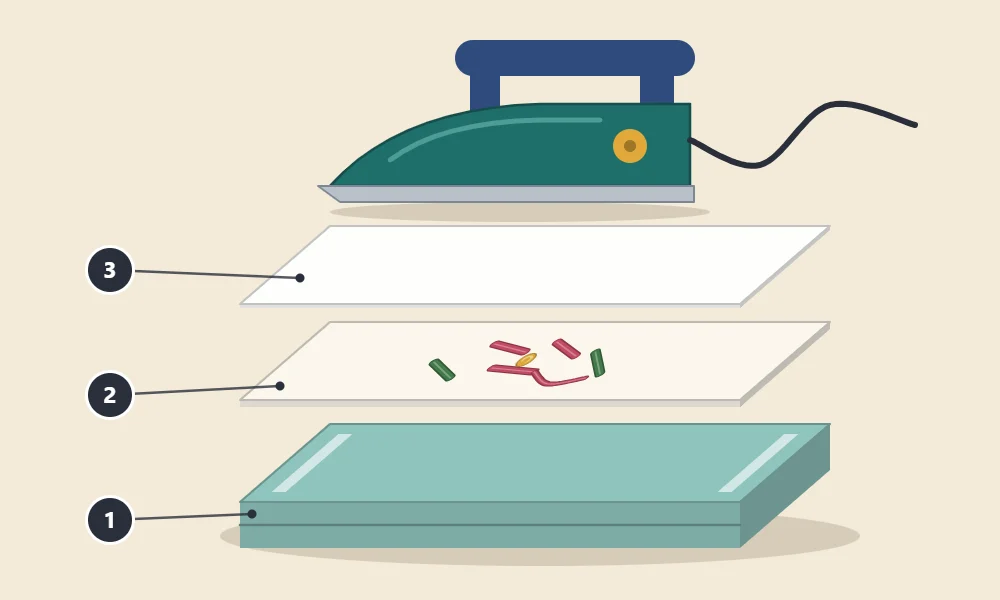
Synthetic and metallic threads can be damaged by heat, so check their labels and keep the temperature low if your piece includes them. An iron stays hot for a while after it is switched off; keep it upright, out of reach of children, and unplug it when you finish.
Tip
If the piece has dried completely, mist the back lightly with clean water before pressing rather than turning up the heat.
If Creases or Ripples Remain
Stubborn hoop rings usually give way to a second damp press. Ripples around dense stitching are a different problem, caused by tension rather than washing, and a press may only partly flatten them. The steps for fixing puckered embroidery go further, including blocking the piece on a board.
Once the embroidery is clean, flat and fully dry, it is ready to be framed. Putting it back in its hoop while damp can leave a new crease, so wait, then follow the steps for finishing the back of the hoop.
Storing Clean Embroidery
Pieces that are not going on display keep best flat or rolled around a tube, with the stitching facing outward so it is not crushed. Folding puts a hard crease through the stitches. Store them somewhere dry and out of the light. For more on how different threads behave, including a note on colorfastness, see the embroidery floss guide.
Frequently asked questions
Can I put hand embroidery in the washing machine?
Hand washing is the safer choice for decorative pieces because a machine is rougher on stitches. For items made to be used, follow the care labels of the fabric and floss and choose the gentlest cycle they allow.
What should I do if a thread color starts to run?
Rinse the piece straight away under cool running water and keep rinsing until the water runs clear. Do not let it sit wet or dry out while dye is still coming off, and be aware that some staining may not come out.
Why is embroidery ironed face down?
Pressing from the back on a folded towel lets the stitches sink into the soft surface, so the fabric flattens while knots and raised stitches keep their shape.
Should embroidery be washed in the hoop?
No. Take it out of the hoop first so the whole piece can be rinsed evenly, and only re-hoop it once it is completely dry.