How to Read an Embroidery Pattern
A pattern is a line drawing plus notes on stitch, color and strand count. Learn what solid lines, dashes, dots and shading mean, how color keys work and how to resize a design for your hoop.
An embroidery pattern is a line drawing with a set of notes attached. The drawing shows where the thread goes. The notes say which stitch, which color and how many strands to use for each line. Once you know where to find those three answers, even a pattern from an unfamiliar designer becomes readable, because nearly all of them are organized the same way.
The Parts of a Pattern
Most hand embroidery patterns, whether printed or downloaded, contain some or all of these pieces:
- The line drawing. The design at full size, ready to be traced onto fabric. Some patterns also include a mirrored copy for iron-on transfer methods.
- The stitch guide. A copy of the drawing with labels showing which stitch is used where.
- The color key. A list linking each color in the design to a floss color number.
- Materials and notes. Hoop size, fabric suggestions, strand counts and sometimes an order of work.
Simple patterns often combine the stitch guide and color key into one labeled diagram. Read the whole thing through once before threading a needle. It takes a few minutes and prevents most of the unpicking.
Reading the Line Drawing
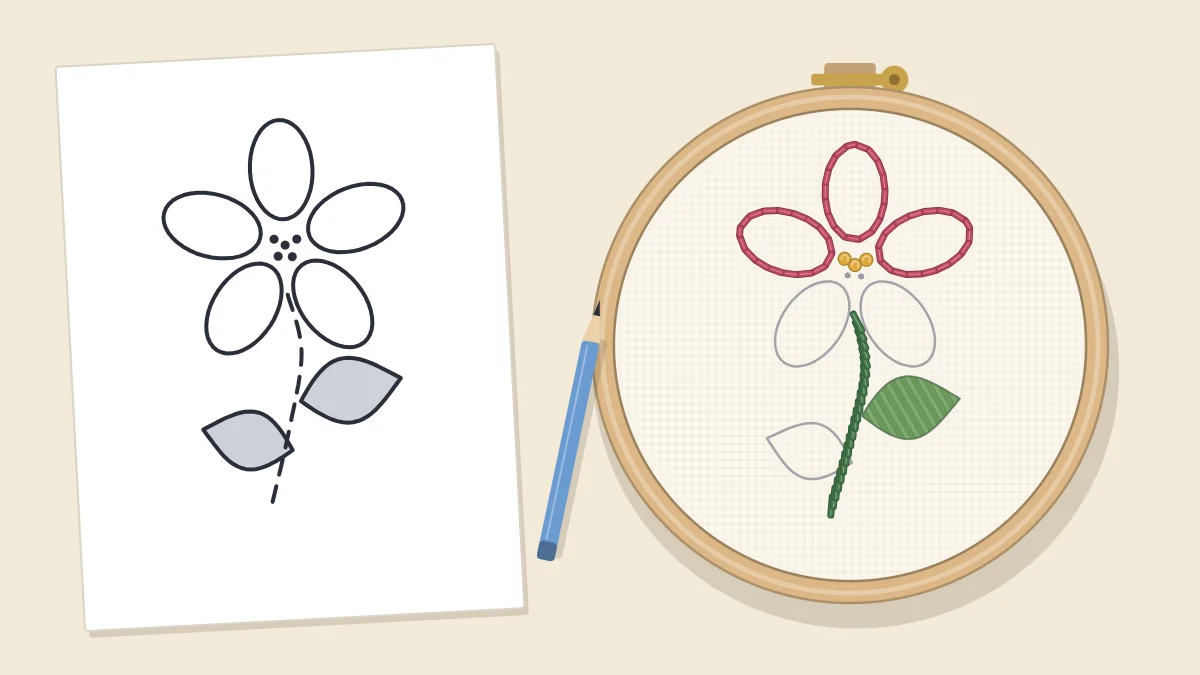
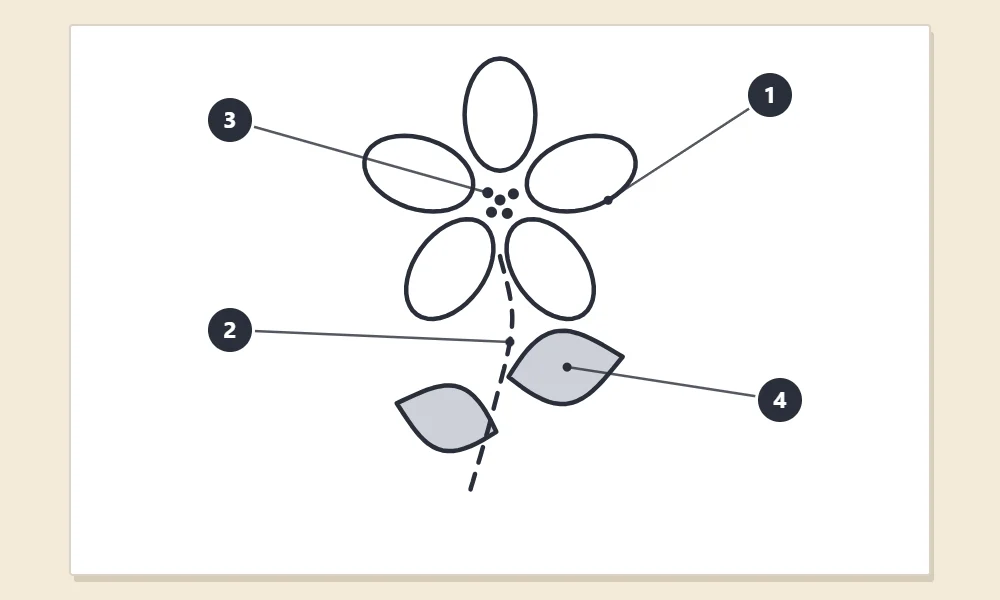
The drawing uses different kinds of marks for different kinds of stitching. The flower in the diagram shows four that turn up again and again.
- A solid outline (1, the petals) marks a line to be stitched along, usually with an outline stitch such as backstitch or stem stitch.
- A dashed line (2, the stem) often indicates a different stitch or treatment from the solid lines. In some patterns it suggests a broken stitch such as running stitch; in others it simply separates one element from another.
- Dots (3, the flower center) mark single points, most often the positions of French knots.
- A shaded area (4, the leaf) is a shape to be filled in solidly, typically with satin stitch or another filling stitch.
Watch out
These marks are conventions, not a fixed standard. Designers use them differently, so always check the pattern’s own legend. What it says about a dashed line or a shaded area overrides any general rule.
Small lines inside a shaded shape are worth a second look. They often show the direction the filling stitches should lie, which changes how the finished shape catches the light.
Using the Stitch Guide
The stitch guide answers “which stitch goes here?” It usually does so in one of two ways: stitch names written beside the drawing with lines pointing to each part, or numbers or letters on the drawing that refer to a list underneath.
Stitch names are often abbreviated. The pattern should explain its own abbreviations, and it is safer to look them up there than to guess. If a pattern leaves a line unlabeled, a plain outline stitch is a reasonable choice for a line and a filling stitch for a shaded shape.
A stitch guide tells you what to stitch, not how. If a stitch is new to you, practice a short row on spare fabric before working it on the real piece.
The Color Key and Floss Numbers
The color key links each part of the design to a thread color. In the example, each row has a color swatch, a number from 1 to 4 that matches numbers on the stitch guide, and a short sample of the stitch worked in that color.
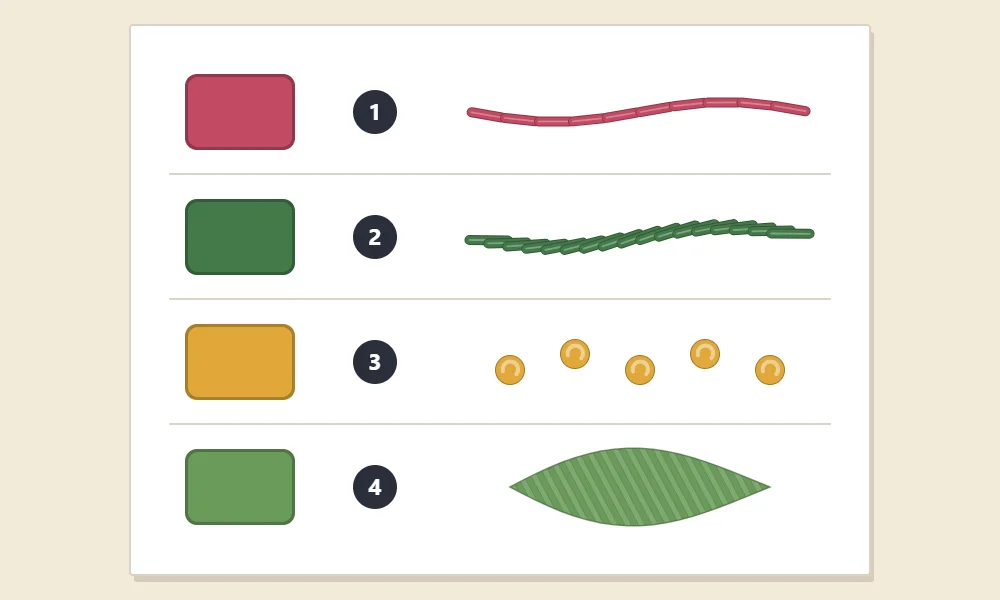
In a full pattern, each row usually also lists a floss color number. Floss manufacturers identify every shade by a number printed on the paper band of the skein. Two points matter here:
- Numbers belong to one manufacturer. The same number from a different maker is a different color. The pattern should say whose numbering it uses, and conversion charts between the main systems are easy to find.
- Printed and on-screen swatches are approximate. Use the number, not the swatch, when matching thread.
You are also free to substitute. If you do not have the exact shade, choose by eye, keeping the same relationships of light and dark between the colors so the design still reads clearly. The embroidery floss guide explains skein labels and color numbers in more detail.
Strand Counts
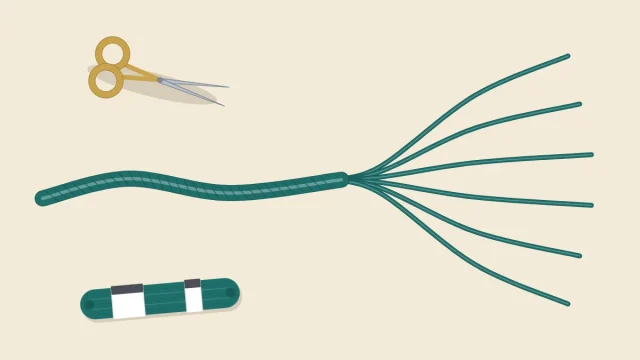
Standard cotton floss has six strands that can be divided, and the pattern states how many to use, either once for the whole design (“use 2 strands throughout”) or stitch by stitch. It may appear in the key as a number in brackets or a note such as “3 strands.”
Strand count controls how heavy a line looks. Outlines and fine details usually take fewer strands, and bold lines or raised knots take more. If you change the size of the design, the strand count may need to change with it. The method for dividing floss cleanly is in how to separate embroidery floss.
Working Out the Order of Stitching
Some patterns give a numbered order of work. When one does not, this general sequence suits most designs:
- Main lines first. Stitch stems, branches and other long lines that the rest of the design hangs from.
- Background elements before foreground. Stitch anything that sits behind something else first, so the overlapping element can be worked neatly over its edge.
- Filled shapes next. Work satin stitch and other fills once their surrounding lines are in place.
- Small details last. French knots and other raised stitches go on at the end, so the working thread does not catch on them and the hoop does not crush them.
Working one color at a time is efficient, but do not carry thread across wide gaps on the back to do it. End the thread and restart instead.
Scaling a Pattern to Your Hoop
A pattern normally states the hoop size it was designed for. The design should sit comfortably inside the inner ring with a clear margin, about an inch (2.5 cm) all around as a good starting point, so the needle can reach every part without bumping the hoop.
To use a different hoop, print or photocopy the design larger or smaller. As a rough guide, the new percentage is the new hoop size divided by the original, multiplied by 100: going from a 6-inch (15 cm) hoop to a 4-inch (10 cm) hoop means printing at about 67 percent. Check the printout against the hoop before tracing.
Scaling changes more than size. A smaller design usually needs fewer strands and shorter stitches to keep curves smooth, and very fine details may need simplifying. A larger design may need more strands, and filled shapes that grow too wide for satin stitch may need a different fill.
Tip
Keep the paper pattern beside you while stitching and tick off each element as you finish it. On a design with many small parts, it is surprisingly easy to miss a leaf.
With the pattern understood, the next job is getting the line drawing onto fabric. How to transfer an embroidery pattern covers four methods and which fabrics each one suits.
Frequently asked questions
What do the numbers on an embroidery pattern mean?
It depends on where they appear. Numbers on the drawing usually refer to entries in the stitch guide or color key, while longer numbers in the key are floss color numbers. The pattern's legend says which is which.
Can I use different colors from the ones in the pattern?
Yes. Substitute freely, but try to keep the same balance of light, medium and dark shades so the parts of the design stay distinct from one another.
What if the pattern does not say how many strands to use?
Two or three strands of six-strand floss are a good starting point for most outlines on a medium-sized design. Use fewer for fine details and small designs, and more for bold lines.
Do I have to follow the suggested stitching order?
No, but it usually helps. Working main lines first and raised details such as French knots last keeps overlaps tidy and stops the thread from catching on finished stitches.